A Brief Guide to TimeSnapper
Getting Started | The "Browse Day" Screen | Options... | Suggestions |
Getting Started
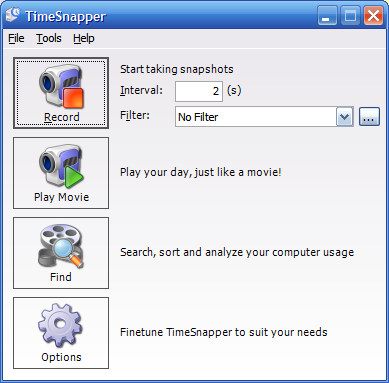
On startup, you are presented with the following screen:
[ Back to top ]
The "Record" button kicks off the recording process.
"Interval" tells TimeSnapper how frequently you want your activity to be logged (in seconds).
Filter lets you stop TimeSnapper from recording certain programs, or let you set that only some programs will be recorded. Details of the Filter feature are available here.
"Play Movie" is the best feature of all, and is shown below.
[ Back to top ]
The "Browse Day" Screen
[ Back to top ]
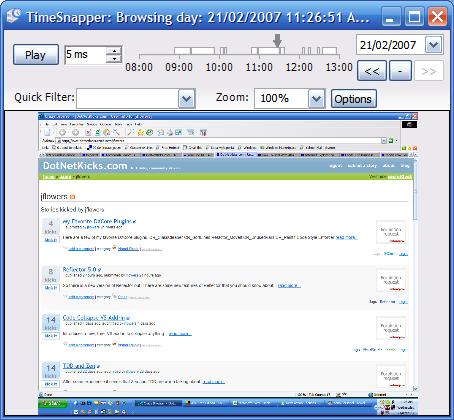
"Play" will show you your day as an animated movie.
The delay between each frame is shown in the Up/Down Picker. A shorter delay will cause a faster animation. The smallest delay you can enter is thirty milliseconds: this makes for an extremely fast and frenetic film.
Note: if you enter a delay that is too fast for your machine, parts of the application may appear to freeze. This effect is temporary. If this occurs, press the pause button and increase the delay to an acceptable level before pressing play again.
While your activity is being played, a "Pause" button is available (instead of a "Play" button). This will let you freeze the movie. The date and time of the current image is shown as the window title at all times.
TimeSnapper now includes our customized TimeBarTM control in the top center of the 'Browse Day' screen.
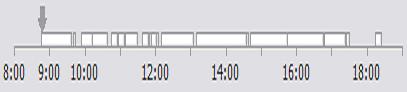
The TimeBar lets you see your activity at a glance. You can quickly tell what hours you worked, when you had lunch and when you had coffee breaks.
You can jump anywhere in your day by selecting a location on the TimeBar control.
Once the TimeBar is selected, you can use your keyboard's right and left arrows to bump the movie one frame ahead or backward. Use the PgUp or PgDown keys to jump backwards or forwards by a larger slice of time.
The Calendar Picker will let you jump straight to the day you wish to watch.
The "<<" button will load the previous day's activity.
The ">>" button will load the next day's activity. (It is disabled in the screen shot because the next day has not been recorded yet... 'tomorrow never comes')
The view can be sized as big or small as you like.
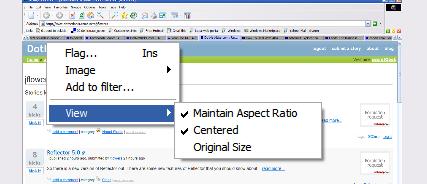
Right-click anywhere on the Movie of your life to view the Context Menu.

By default the image is stretched to be as large or as small as the Day Browser. But there are two other options, available from the Context Menu.
You can view the image at Original (full) size, either centered, or anchored to the top right corner.
[ Back to top ]
Options...
In the main menu, chose View | Options... and you will be presented with the options form. The Options form has four tabs:
- Image Quality
- Archive
- Options
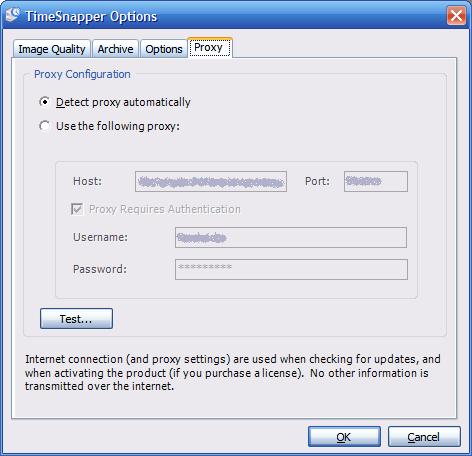
- Proxy
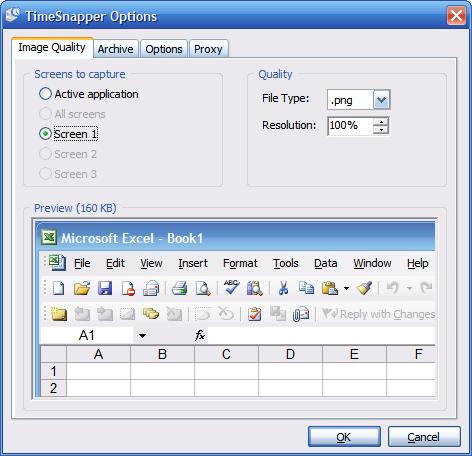
The 'Image Quality' tab
[ Back to top ]
On the "Image Quality" tab, there is a drop down list labeled "File Type".
The available file types are:
- .png
Portable network graphics format. An open format usable on any system. At maximum quality it is 'lossless', at lower quality it compress into quite a small size.
- .jpg
'JPEG' (Joint Photographic Experts Group). A 'lossy' format, that comrpesses well at the loss of 'crispness' resulting in a blurred image.
- .gif
'Graphic Interchange Format', low resolution lossy format, that sacrifices pallet size, but can stay quite crisp.
- .wmf
Windows Meta File: a vector format native to Windows, supported by OLE Automation.
- .tiff
Tagged Image Format File. An uncompressed format supported by Windows, Macintosh and others.
- .bmp
A proprietary Microsoft Windows image format. This file format cannot be used on a Web page.
- .emf
Windows Enhanced Meta File: A microsoft specific extension to the CGM Metafile standard.
The resolution picker can be used to select the level of detail you wish to include in each screenshot.
The choice of resolution and file type will determine how much space each file takes on your hard drive. As you alter either of these, you can see an estimate of how much space a typical file will take up, along with a preview to give you some idea of the image quality involved. You will see that high quality images take up a lot of space, while low quality images are very grainy.
The art lies in finding a compromise that suits your particular needs.
"Screens To Capture"
You can choose to capture:
- Active Application
Just the application (program window) that has focus at a particular time.
- All Screens
For example if you have three monitors -- you will capture all three
- Screen 1
Only capture the image on your primary monitor. (If you only have one screen, this will have the same effect as 'All Screens')
- Screen 2
Only capture the image on your second monitor (if applicable)
- Screen 3
Only capture the image on your third monitor (if applicable)
[ Back to top ]
The 'Archive' tab
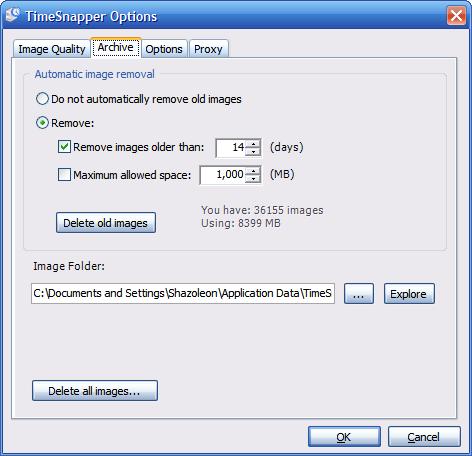
The archive tab lets you set up automatic removal of screenshots. This is a much requested feature and very handy if you low on hard drive space, or particularly security conscious.
If you do not wish to remove old images, just select the first control: "Do not automatically remove old images".
If you do wish to remove old images, you have two choices:
You can allow automatic removal of images older than a given number of days. (To do this, check the box next to 'Remove images older than' and then select the number of days from the up/down picker).
Alternatively, you can enforce a maximum size for all the screenshots.
To delete all screenshots at once, click the "Delete all history..." button. Note that this button does not delete all history of the world: it only removes image files that timeSnapper has created. If any files are encountered in TimeSnapper's folder that were not created by TimeSnapper, then the delete operation is cancelled without deleting any files.
[ Back to top ]
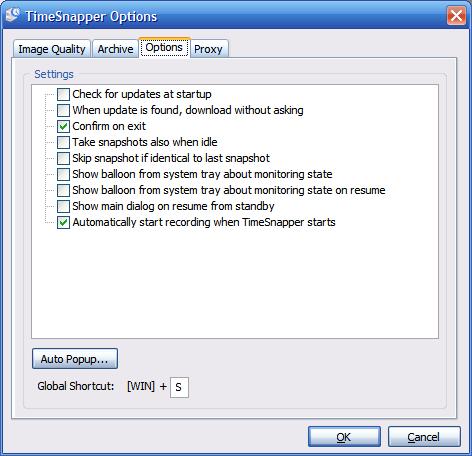
The 'Options' tab
[ Back to top ]
Suggestions
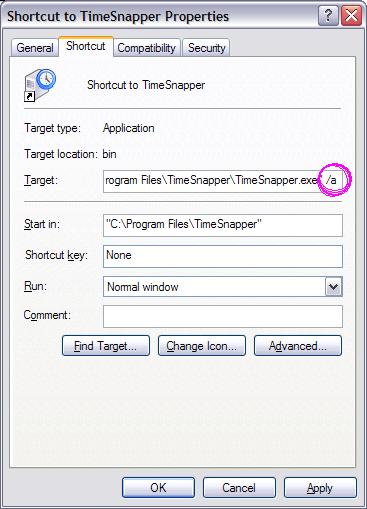
For best operation of TimeSnapper, we suggest you add a shortcut to TimeSnapper in your "Startup" folder (under your Windows 'Start' Menu).

If you include the start up parameter "/a" then TimeSnapper will automatically minimize at startup, and cause less interruption.
[ Back to top ]